
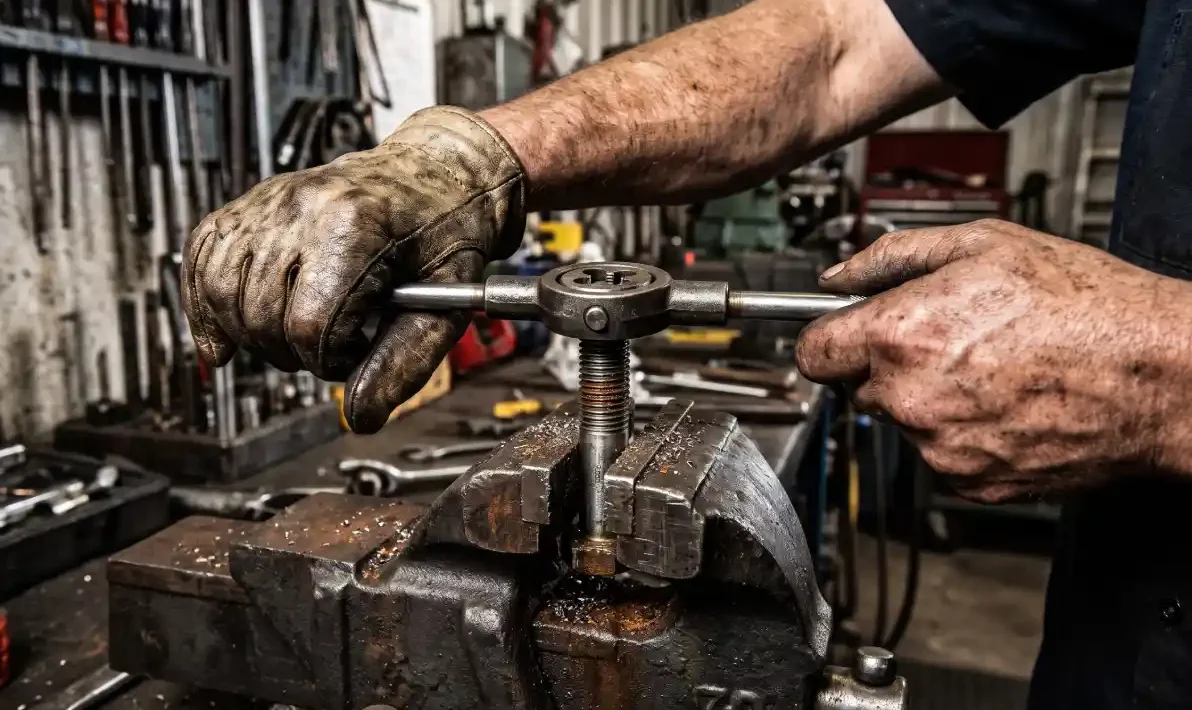
A bolt with flattened threads doesn’t always belong in the bin. It needs the right call, because a button die helps in a narrow set of cases and can ruin the part in others.
The damage is on a male thread
Button dies work on outside threads only. That sorts the first decision.
If the fault sits on a bolt, stud, shaft end, or threaded rod, a die is in the right family. Inside a nut or tapped hole, it isn’t. Taps cut inside threads and dies cut outside threads, so each has its own job. Suppliers of drills taps button dies stock both for that reason.
Mix-ups happen when work starts fast. A cross-threaded joint gets blamed on the bolt when the tapped hole holds the burr or paint buildup. A stud won’t start by hand, so someone assumes it’s at fault and reaches for the wrong tooling.
A tap doesn’t automatically repair a stripped hole. Stripped means the thread flanks are torn away and material is missing. No hand tool puts that metal back. Most maker documents call for an insert or a new part, used within stated limits.
The first check is location. If the inside thread is damaged and the bolt looks clean, the die stays on the bench. When the male thread has flattened or rolled-over crests and the maker allows external chasing, a button die can enter the plan.
The threads are pushed over, not torn away
Stripped and deformed look alike from two steps back. They are different failures that need different fixes.
Deformed means the thread form remains but is pushed out of shape. Crests look smeared or bent from cross-threading or a nut forced past grit, while the flanks retain most of their metal. Light nicks belong here too, and makers sometimes list a thread file or chaser as the lighter option.
Stripped means metal is gone. Crests are sharp and torn, roots look wide, or whole turns pull free with the nut. Galling can do the same in stainless work, where pickup tears chunks from the flanks and leaves a rough, locked surface. Corrosion can thin the profile until the crest line turns uneven.
A button die can’t replace missing metal. At best it cleans a deformed profile; at worst it cuts the remaining flanks smaller, leaving a bolt that threads on but won’t hold load.
That mismatch scraps the bolt.
Watch the crest volume. If the ridges remain, though dull and pushed, and the roots look full, external chasing may be allowed under maker rules. If ridges are torn, thinned, or absent, replacement is the safe call regardless of die setting.
The end of the part still shows a usable start
Most outside threads start with a chamfer or lead. That angled entry centers the nut and gives a die a true path.
When the first one or two full threads are crushed, mushroomed by a hammer hit, or bent by a side load, the die has nothing square to follow. It tips at the start and follows the damaged path. The result threads for a turn or two before binding, or cuts a new path that fights the old one.
Look at the end under good light while turning the bolt slowly. A usable start has a fairly even chamfer ring with evenly spaced thread entrances. A lost start has a lopsided nose, a flat spot, or entrances that vanish into a smear.
Material matters too. Mild steel dents and rolls, while stainless galls and grabs. Hardened fasteners resist the die and can chip its edges. Workpiece hardness changes tool loading, and hard or brittle parts often fall outside hand repair entirely.
If the nose is gone, don’t force a start. Stop and assess. A qualified machinist can judge whether the end can be faced back to sound threads within maker limits using proper workholding, or needs a traceable replacement. That decision protects strength. Recutting a false start can’t restore it.
The thread spec is known from documentation, not guessed from tools
A thread pitch gauge confirms pitch or threads per inch. Calipers give an approximate major diameter. Neither proves the standard, tolerance band, thread form, or handedness.
That gap causes scrap. An M10 x 1.5 and a 3/8-16 UNC can look close at a glance, as can some fine metric and Unified pitches. A wrong-pitch die recuts every turn into scrap in one pass. There’s no reverse move.
Check the drawing, parts manual, or maker marking first. Confirm metric M-pitch or Unified TPI, right-hand or left-hand, and thread form. ISO 68-1 for metric and ASME B1.1 for Unified inch threads define a 60-degree profile. Dies for those systems follow that profile, with tolerance classes such as 6g or 6h marking the fit band. Other legacy inch forms use a different angle, so diameter alone doesn’t establish form.
The actual spec and qualified assessment decide. Gauges and calipers support the documents, not certify the thread.
Handedness deserves its own look. Left-hand threads appear on gas fittings, some wheel and axle work, and rotating shafts where a standard nut would loosen. The slope leans the other way, and the die must be marked for that hand. If the hand isn’t stated, stop. A right-hand die destroys a left-hand stud.
The fastener is not critical, stretched, or eaten by corrosion
Some bolts can be chased; others must be replaced. Load decides.
Fasteners holding wheels, brakes, steering, lifting points, pressure boundaries, or structural joints are generally single-use in maker practice once damaged. The same rule covers fasteners with a stated torque-plus-angle, prevailing torque lock, or lot-traceable grade mark where strength must be on record. Recutting can’t restore grade strength or certify the part.
Stretch is another stop sign. A bolt pulled past yield shows a narrow waist, pitch drawn out in one zone, or an undersized shank. Those signs point to metal fatigue. Chasing hides the symptom and leaves the weak shank.
Corrosion needs the same caution. Surface stain differs from pitting, flaking, section loss, or rust packed deep in the roots. A die can shave high spots and make the nut spin, but the cross section stays reduced. The joint looks fixed and isn’t.
Heat damage counts too. A fastener with blue or straw color from excess heat, or one pulled from a fire zone, may have lost temper. No external repair returns that property.
Those signs call for removal and replacement with the same grade and finish per maker spec, with a safe record of the change. External threading repair only fits non-critical parts where the maker allows it and the base metal is sound.
The tool choice follows maker guidance for outside threads
Once location, damage, start condition, spec, and load all point to repair, tool selection still has to be exact.
External threading uses a round button die held square in a die stock or handle. Alignment and feel decide whether the cut starts true. HSS is common for ferrous work, though the correct grade, coating, and size range come from the maker catalog for the job. No universal die covers metric and inch work.
Thread files and chasers are less aggressive than dies. Cutting dies remove metal to form a profile; chasing or restoring types have extra clearance to follow an existing profile with less cutting. The tool maker and part maker specify which type fits and whether either is allowed. Catalog language varies, so don’t treat the terms as interchangeable.
Finding the correct button die means sourcing one made to the drawing’s thread standard, with the right hand and tolerance class.
Don’t guess between standards. Metric dies are marked M with pitch, such as M12 x 1.75. Unified dies are marked UNC or UNF with TPI, such as 1/2-13 UNC. Marks must match the spec line for line. Some button dies are adjustable split types; others are solid. The maker sets the adjustment method, stock fit, thread-cutting oil type where allowed, and force limits. A qualified person works within those limits with the part held rigid, stopping at taper, chatter, or hard binding.
The result can be checked with proper gauges
A repair that looks clean can still fail. Looks don’t carry load.
Checking starts with cleaning, since chips and oil hide torn flanks. Clean the thread using the approved method with appropriate eye protection, remove chips safely, and inspect under good light. Full crests should run evenly around the bar. Roots should look sharp and free of tears, with a centered start chamfer.
Fit alone doesn’t prove safety. A known-good nut of the same spec shows whether the thread assembles, not whether strength remains or the tolerance class is met. Stop and get a qualified assessment when the part matters or anything looks off.
Proper checking uses calibrated gauges. A Go/No-Go gauge or calibrated ring check for that thread system and class gives a size pass or fail. External metric thread classes such as 6g or 6h define tolerance and allowance requirements; the specified class, not a general impression of tightness, determines the correct gauge. A clean-looking thread that fails the gauge check still gets replaced.
Lathe thread cutting sometimes becomes the backup method. When hand-die work won’t hold size or the start won’t square up, a qualified machinist may single-point the thread on a lathe or mill within maker limits, or condemn the part. That requires rigid workholding, correct tooling, and measured checks. It isn’t a bench improvisation.
Keep a short record either way, noting the spec, gauge result, and whether the part was kept or replaced with a traceable fastener. The next person touching that joint needs facts, not guesswork.
A button die earns its place when damage is outside, deformed rather than missing, square at the start, fully identified on paper, non-critical in service, matched to maker tooling, and proven with gauges. Miss any one of those signs and replacement or shop repair is safer. Good threads feel almost boring. The nut starts by hand, turns smoothly, and seats solidly. That plain result is the goal.
